Image Logic Add-on for Your Spreadsheet Calculator: new powerful add-on
The Image Logic Addon lets you change the WooCommerce product image in real-time based on the field's value chosen by the customer.
The Image Logic is not included in Your Spreadsheet Calculator, but it's a separated addon.
2 - Install
Installation Requirements
Your Spreadsheet Calculator version equal or greater than 2.3.0. You can follow the instruction here how to install it.
Installation
Go to "Plugins > Add new" in your WP-admin website
Click on "Upload Plugin" then click on "Browse..." and select the file "awspc-product-image-logic.zip"
After the plugin has been installed, click on "Activate"
If you have any problems, first check:
If you have proper permissions/ownership of the folders and files inside "/wp-content/plugins/awspc-product-image-logic"
If you have disabled the WP_DEBUG by setting define( 'WP_DEBUG', false ); in your "/wp-config.php" (more information available here)
3 - Usage
You can add product images by following these steps:
Click on the "Calculator" tab
Click on the drop-down "Edit" button of your calculator where you want to apply the Product Image Logic
Click on "Product Image Logic"
In this page, you can add new images by clicking on "Add Rule". Each image has its own associated rule. If rule conditions are met the associated image will be shown to the customer.
After clicking on "Add Rule" a popup window will be displayed where:
Name: A descriptive name of the rule
Image: The Wordpress Media Library will open by clicking on the image. Select the image you want to display.
Rules: Create the rule that makes the image appear on the WooCommerce Product Page. The rules follow the same behavior of the Conditional Logic
Click on "Save" to create the new rule
You need to enable the Product Image Logic feature by clicking on "Enable Product Image Logic" on the Product Image Logic form. If you want to disable it, you need to click on "Disable Product Image Logic".
Note: If you set two or more non-strict rules only one image will be shown. For example:
Rule 1: Set Image="Picture_1.png" when "Height >= 100"
Rule 2: Set Image="Picture_2.png" when "Height >= 300"
As you can understand if the customer put "Height = 500", both rules are met. So only one of this will be the winner. In this case, you can "strict" your rules:
Rule 1: Set Image="Picture_1.png" when "Height >= 100 AND Height < 300"
Rule 2: Set Image="Picture_2.png" when "Height >= 300"
4 - Multilayer Feature
The Multilayer feature of WPC Image Logic is a really powerful feature: It will let you combine different images to create a unique image which results depends on the fields selected by your customer.
Let's suppose your selling tables, this is just the most simple example. If you're selling tables, it is most likely that you have different kind of table materials (Wood, Metal, and so on), and it is most likely that you have different colors, also for different parts of your tables.
For example you could have a table where the top table have the following colors: Red, Blue and Green. Instead the legs of your table could have the following colors: Red, Blue and Green. Of course you can sell a table with a Red top table and Blue legs. Or you could sell a table with a Blue top table and Green legs.
As you can see there a lot of different combinations. You should create as many images as many combinations you have. In the previous example (Which is a simple example) you should create 9 different combinations of images. More simple would be to create 3 different images for the top, and 3 different images for the bottom (for a total number of images equal to 6) and combinate these images dynamically using the Multilayer feature.
You can follow these steps to build the previous example:
Let's suppose you've created 2 List fields for your WPC Calculator: Bottom Table Color and Top Table Color, both with the following values: red, blue, green. Select your calculator from the list of calculators, click on the dropdown icon so click on "Product Image Logic"
You should now create two different categories. They will group the images for each layer. Click on "Manage Categories" and click on "Add Category"
Add a category named "Table - TOP"
Add a category named "Table - BOTTOM"
Click on "Back to Image Logic"
You should now create a rule for each different image, so click on "Add Rule"
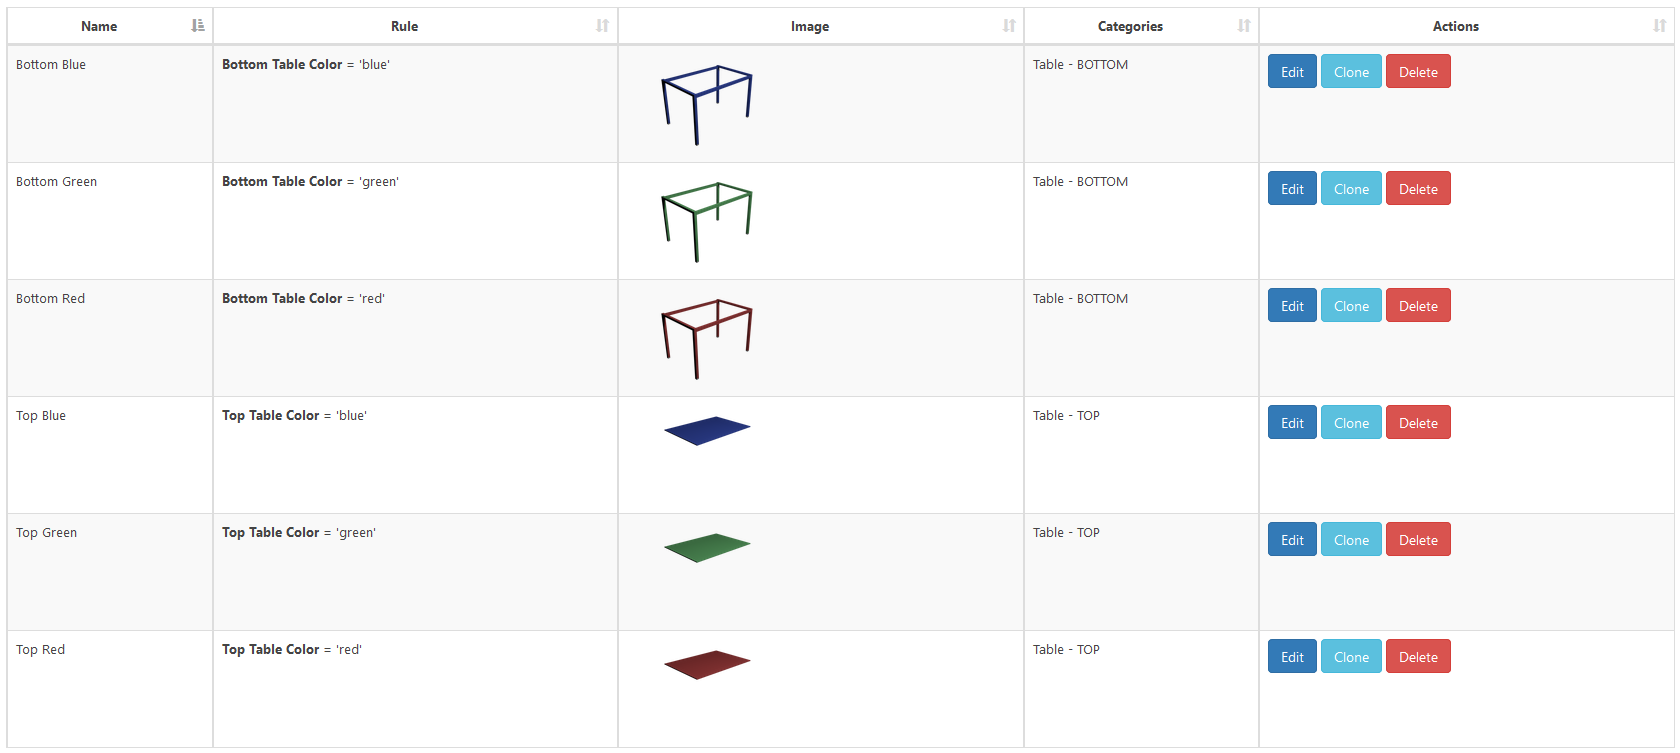
Add a rule named "Top Red", select the image of the top red table, add the rule and select the category "Table - TOP"
Add a rule named "Top Green", select the image of the top green table, add the rule and select the category "Table - TOP"
Add a rule named "Top Blue", select the image of the top blue table, add the rule and select the category "Table - TOP"
Add a rule named "Bottom Red", select the image of the red legs, add the rule and select the category "Table - BOTTOM"
Add a rule named "Bottom Green", select the image of the green legs, add the rule and select the category "Table - BOTTOM"
Add a rule named "Bottom Blue", select the image of the blue legs, add the rule and select the category "Table - BOTTOM". You should now have a situation like this:
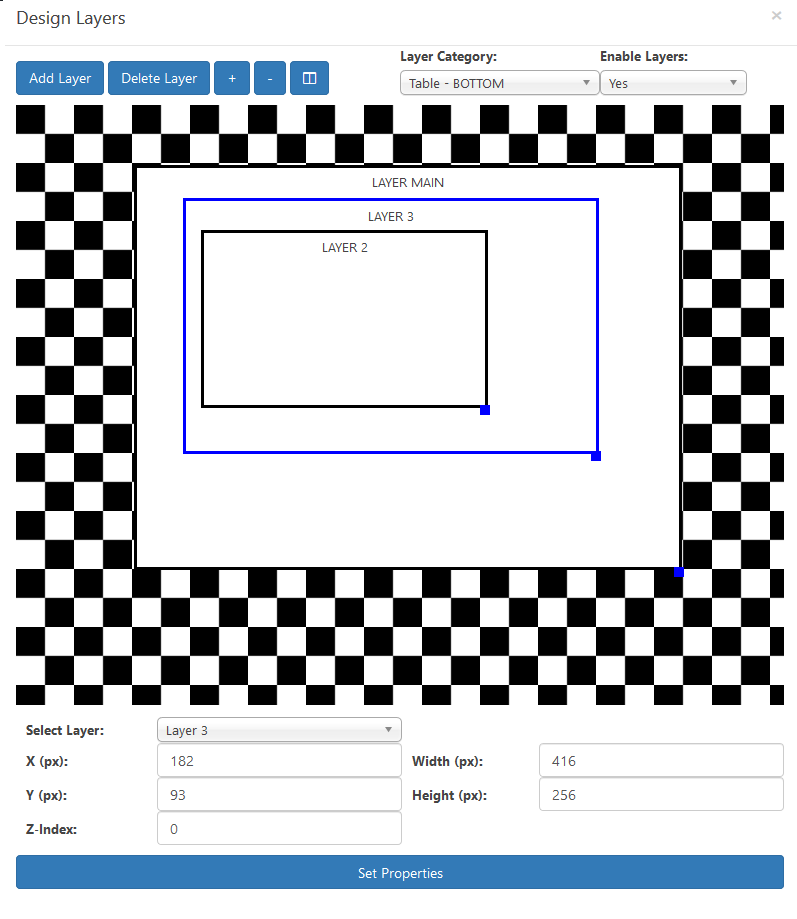
Click on "Manage Layer Models" (See the below chapter to have more information about the Manage Layer Models Panel) to create the different type of layers. Since we have only the Top and the Bottom (Legs) of the table, these are two layers. As you can see there is a "LAYER MAIN": This is the container for all the layers. If you do not include the layers inside this layer, the images will be cut.
Click on "Add Layer" and a new layer will be added. Set "Layer Category" as "Table - TOP"
Click on "Add Layer" to create a new layer. Set "Layer Category" as "Table - Bottom"
You can now drag & drop the layer and change their position or change their size by clicking on the blue rectangle on the bottom-right.
Click on "Save" to save the layers.
Click on "Enable Product Image Logic" to enable the addon.
More on "Manage Layer Models"
Add Layer: Adds a new layer
Delete Layer: Deletes a selected layer. To select a layer click on the desidered layer or select it by clicking on a "Select Layer" item
+: Bring the layer to the front (It increases the Z-index)
-: Bring the layer to back (It decreases the Z-index)
Double Window Button: It will set the size and position for each level the same as the MAIN LAYER. This could be useful if you export your images from a 3D software (like Blender) and you just need to overlap each image to get a good result.
Layer Category: You can choose the category for the selected layer.
Enable Layers: To enable the multilayer feature set it to "Yes", otherwise to "No"
Select Layer: Select the layer from a list of layers. This is useful if you can't click on the desidered layer.
Set Properties Button: You can change X, Y, Width, Height and Z-Index of the selected layer. To confirm changes you've to click on this button.